Send a custom email message
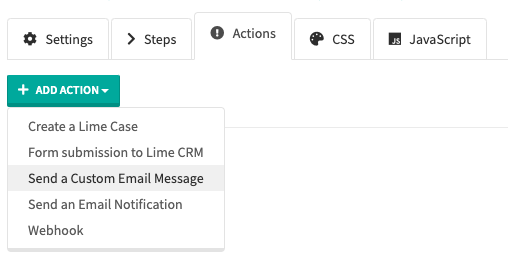
To set up your forms to Send a custom email message you navigate to the Actions tab for your form and then select Send a custom email message from the drop down list at the top of the page.

The first thing you can choose to set is Logotype which will be visible at the top of the email sent to recipient when submitting the form. Drag and drop your logotype in the dialog window “Drop files here to upload” or click in the box to select a file from your computer.
Tip: Avoid a large email
Do not use a high-resolution image for your logotype since this could potentially make your emails very large in file size and thus slow to send.

- From (name) is filled in with the name you want to be visible as the sender of the email.
- From (email) can be set up with an email address you control to send emails from your organizations email.
- Subject is filled in with the topic or heading that you want on the email.
- Message type the message you want to send to the recipient. You can write simpler HTML code to resize headings, set colors, insert links etc.
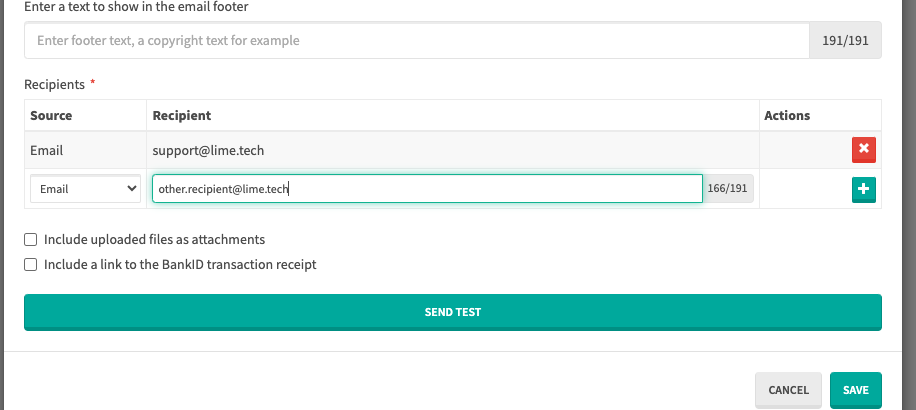
- The option to write a shorter Text to show in the email footer is available below the Message field. Here you can write a copyright text or similar.
Get field values
To make emails more dynamic and personal, you can retrieve values from previously filled in fields from the form and present them in the message sent to recipients. To do this you need to name the fields that you want to retrieve in beforehand. Simply click the drop-down list and select the name of the field you want to retrieve in the message.

Example: use field values
Hi, {{ name }}! Thank you for your order of {{ product_id }} at {{ start_date }}
Add recipients
You can choose between Add a recipient email manually or Get recipient email from a field value.
If you chose to add a recipient manually it is important to first write the email address and then click the green + (add) button before saving the Action.
To remove a recipient click the red x button before saving the action

Include files and/or receipts
Finally, you have the options to both Include uploaded files as attachments and Include a link to the BankID transaction receipt in the bottom of the dialog window.